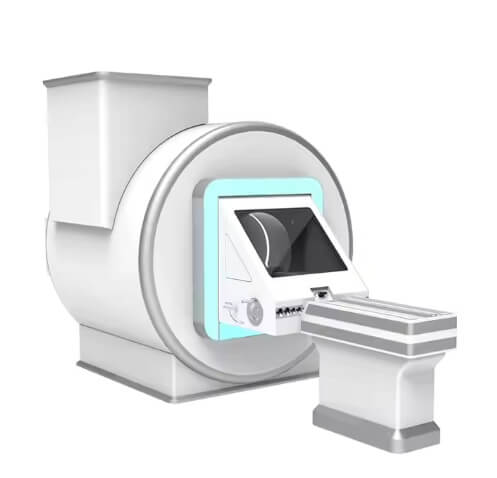
Adjustment Flat Electric Stair Climbing Wheelchair
$5,680.98 $5,998.95
Climbing Wheelchair Description
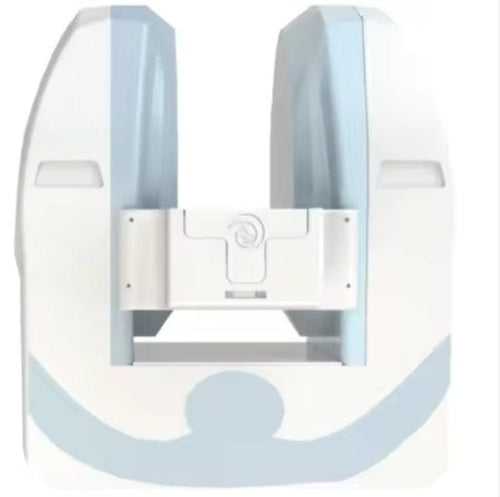
1. Model: Battery function analysis as shown in the figure

2. Product parameters
Motor Type: DC Brushed Motor Climbing Machine Main Material: Aluminum Alloy
Voltage: 24V Current: 13A Power supply: 250W Net weight: 32/39/42kg
3. Usage
(1) Unfold the climbing machine until the sliding groove is securely fastened.
1. Grasp the seat and unfold the pole with your hand, lift it upwards and backward, and pull it straight
2. Grasp the pull rods on both sides of the button box with both hands and stand the climbing table up. In place, pull the foot pedal down and snap it in place, and complete the deployment.
3. Push the handle upwards and pull it into place, then hold the handle forward and press it into place
(2) Use of Climbing Machine
1. Push the climbing machine to the edge of the stairs, grab the middle part of the upper crossbar with your right hand, grab the lower end of the pull rod with your left hand, support it with your left hand, and pull back to unfold the track in place with your right hand.
2. Pinch the left and right locking pin handles with your left finger, and hold the lower end of the button box with your right palm to lift it up. Adjust the height of the pull rod to the height where the person is sitting.
3. Lower the clasp by hand to a certain distance, and press the head cushion against the human body to sit up to the position of the head, pulling it tightly and sticking it to the clasp
Above.
4. Take out the battery from the box, align the battery plug backwards and downwards with the slot of the battery holder, and then press down to install the battery. Normal, the power display screen on the button box lights up and shows the current state
5. Press the battery main power button and the green light will light up to indicate the battery's level and voltage.
6. Adjust the direction of the climbing machine so that the back of the machine is facing the stairs and keeping the foot about 15 centimeters below the first one below the stairs. Then, the operator stands on the second staircase, grabbing the sponge handle on both sides of the button box with both hands, and extending one foot to step on the middle crossbar. Pull both hands back to make the climbing machine fall backwards. When the bottom of the track touches the ground, the operator steps back above the stairs and continues to pull down the climbing machine until the track surface of the climbing machine is completely in contact with the stair surface.
7. Grasp the sponge handle with both hands and use a certain amount of force to press down to keep the climbing machine stable. Then, press the up button with the big finger of the right hand to start the climbing machine, and use a certain amount of force to keep it stable.
8. When the climbing machine reaches the bottom of the last track and just leaves the second to last track, lift both hands upwards to keep the center of gravity of the climbing machine not forward or backward, and the climbing machine can climb to the staircase platform. At this time, do not stop and continue to operate until the front wheels can safely land on the ground. At this time, hold both hands up and lift again, while extending one foot on the road to make the front wheels land slowly, and fully climb the stairs.
9. When going downstairs, adjust the position of the climbing machine to move the front wheels forward, with the front wheels about 10 centimeters away from the edge of the stairs. Grasp the sponge handle with both hands and extend one foot to step on the lower crossbar, then pull the lower end of the crawler to the ground with both hands, and then pull it to the center of gravity that is neither forward nor backward to make the climbing machine move forward and start descending the first staircase. Keep it steady when reaching the point, keep it on the left side, press the down button with the right hand to press the down button for the second staircase, stop for a while, pull back with both hands to adjust the crawler's crawler to be level with the staircase surface, and then press the down button to move the climbing machine downwards. Pay attention to keeping both hands steady until the lower end of the crawler reaches the ground. When the lower end of the crawler reaches Stop, lift the climbing machine with both hands and then extend one foot to support the middle crossbar to stabilize the machine. Slowly land the front wheels and complete the descent operation. Attention: Before carrying passengers, it is necessary to be proficient in operating the empty vehicle.
(3) Folding of climbing machines
1. Remove the headrest, move the collar up to the top, hold the locking pin handle with your hand, and hold the button box with your right hand while pulling down to lower the lever to the lowest position.
2. Grasp the upper crossbar with your right hand and lift it upwards, and press down on the folding handle of the track with your left hand. At this time, the belt will automatically retract under the action of the spring (be careful not to pinch your hand).
3. Grasp the push handle with both hands, press down on the folding part of the push handle with the mother fingers of both hands, then press down to fold the push handle, and pull up to fold the handle and align it with the pull rod.
4. Grasp the sponge handle with both hands and extend one foot to press on the lower crossbar, then pull the crawler down and lay it flat on the ground.
5. Straighten the seat belt and place it under the backrest. Use your left hand to pinch and pull the seat folding bar, and your right hand to grab the front end of the seat and pull it backwards to fold up the seat. Complete folding. (Pay attention to sorting out the front wheels to avoid folding and not seeing them properly)
(4) When the green grid on the monitor is empty, it is necessary to charge the battery in a timely manner. (Otherwise, it will affect the battery's lifespan)
1. Extend four fingers of your right hand to the empty space below the battery holder, lift the battery up and down with your fingers for easy lifting, and then grab the upper end of the battery with your left hand to remove it.
2. Insert the charging plug of the charger into the charging port of the battery, and plug the 220V power plug of the charger into the socket at home. Turn on the charging switch on the battery, and the red light will light up to start charging. When fully charged, the green light will light up. (Watched by someone while charging)
4、 Product maintenance
1. Regularly check if screws are loose or falling off.
2. Pay attention to any abnormal sounds from the climbing machine.
3. Pay attention to the usage of the battery, and if there is insufficient battery, it should be charged in a timely manner. Someone should supervise the charging process.
If not in use for a long time, please store it fully charged and charge it every two months.
4. Turn off the main power switch in a timely manner when the battery is not in use.
5、 Disinfection and sterilization methods
1. The climbing machine uses a UV sterilizer or alcohol wipe to disinfect and sterilize the product.
6、 Transportation and storage
1. When transporting this equipment, it should be moisture-proof, anti inversion, and avoid severe vibration;
2. The transportation and storage conditions of this equipment are relative temperature of -40 ℃~55 ℃, relative humidity not exceeding 10%~80%, atmospheric pressure of 500hpa~1060hpa, no corrosive gases, and well ventilated indoor.
7、 After sales service
1. From the date of production, the product comes with a 2-year warranty for the motor, a 15 month warranty for the battery, and a 1-year warranty for the entire vehicle;
2. Our company provides after-sales "lifelong service" for our products: installation, debugging, guidance on operation, maintenance, and repair can be provided according to user needs. Due to improper operation or accidental damage, as well as repair services one year later, our company only charges cost fees